Karl Jan Clinckspoor
My personal site
Creating booklets from U4 manuals
by Karl Jan Clinckspoor
Objective
From the PDFs available from GOG, create physical booklets, going through the process of arranging the pages in LaTeX.
Workflow
Arranging the pages
When you download the GOG PDFs, they all have very diffent layouts. Some have two physical pages per electronic page, some have both, some are well behaved, and fit an A4 page perfectly. Before printing, you will have to correct all those differences.
In addition, I will be making a booklet, and I only have a normal A4-sized printer. Since A5 is half the size of A4, and we need to print on both sides of the paper, we can fit 4 pages on each sheet.
Not imagine what would happen if you were to tell your printer to print each PDF file sequentially (assuming it’s well formatted, like the spellbook, and you’re not using its builtin booklet printing). To follow along, I recommend you get two pieces of paper, write 1, 2 (turn around) 3, 4, get another, write 5, 6 (turn around), 7, 8. You will get something like:
(sheet 1)
    (front) | Page 1  | Page 2 |
    (back)  | Page 4  | Page 3 |
(sheet 2)
    (front) | Page 5  | Page 6 |
    (back)  | Page 8  | Page 7 |
Note how behind Page 1 there’s Page 4, not Page 3! When doing a booklet, one folds all the pages together in half and fix them together in the middle (you can use a stapler, but I’m going to show how to sew it). The sequence of this book would be:
Page 1 | Page 4 | Page 5 | Page 8 | Page 7 | Page 6 | Page 3 | Page 2
To build this sequence, start by putting page 1 to the right, then consider that behind page 1, there’s page 4, then you get to the second sheet (page 5), then its backside (8), its neighbor (7), its backside (6), then back to sheet 1, to the neighbor of Page 4 (3), then its backside (Page 2).
We want this sequence:
Page 1 | Page 2 | Page 3 | Page 4 | Page 5 | Page 6 | Page 7 | Page 8
To find the correct arrangement, compare these sequences to find the substitutions you need to make:
(wrong) Page 1 | Page 4 | Page 5 | Page 8 | Page 7 | Page 6 | Page 3 | Page 2
(right) Page 1 | Page 2 | Page 3 | Page 4 | Page 5 | Page 6 | Page 7 | Page 8
(subst) 1 -> 1 | 4 -> 2 | 5 -> 3 | 8 -> 4 | 7 -> 5 | 6 -> 6 | 3 -> 7 | 2 -> 8
Now go back to the original sequence and perform those substitutions. You will get:
(sheet 1)
    (front) | Page 1  | Page 8 |       |
    (back)  | Page 2  | Page 7 |       v  ^
(sheet 2)                                 |
    (front) | Page 3  | Page 6 |       |
    (back)  | Page 4  | Page 5 |        ->
Note how we have to follow downwards to the bottom, then right, then up. Also, note how the way we’re doing this, the pages need to be multiples of 4. If that doesn’t happen, you have to add blank pages (this is the origin of those blank pages on books you sometimes find at the end, or at the beginning, where it’s written “this page has been left purposefully blank”).
This was a lot of work just for 4 pages. Besides, manipulating PDFs can be tiresome. I
would rather spend 2 hours figuring out how to automate something rather than spending those 2
hours manually doing it. I learn something new, and will have a tool for the future. I used
LaTeX to do this, specifially the pdfpages package. How I did it, and the problems I faced, I
will show later.
Binding the pages together
This is the manual part of the process. First, after preparing the appropriate PDFs, I printed them with my monochrome duplex laser printer. It’s a bit annoying that the PDFs have a background tint, so the text isn’t as clear as I would like it, but that’s OK, it’s plenty readable.
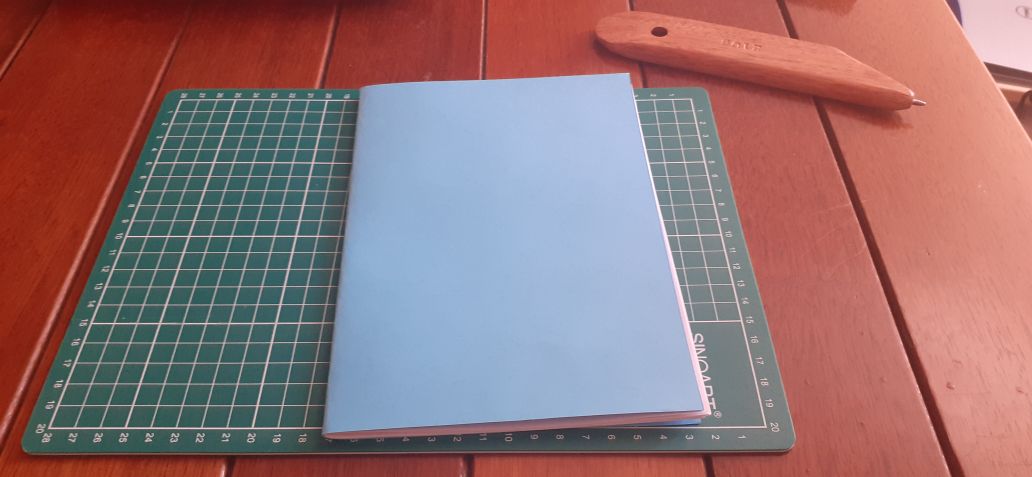
Then, we need to procure something to work as a cover, to preserve the interior pages. I didn’t have anything good available, so I used some cardstock and blue paper. The covers and the printed sheets have to be folded together in half, then have to be perforated in the spine at appropriate spacings, sewn together and trimmed. Voilá, there’s your booklet.
Requirements
Part 1: Arranging the pages
- Some knowledge of the command line
- The GOG Ultima IV PDFs
- A LaTeX distribution (MikTeX, TeXLive)
- Python with PyPDF2 installed
- Poppler tools (specifically
pdf2psandps2pdf). You’ll see why later.
You can circumvent having to install MikTeX or TeXLive by using Overleaf. You just need to paste the code I will show you, and upload the appropriate PDF.
To install Python on Windows, head over to https://www.python.org/, download the newest version for
your operating system. Follow the instructions (remember to add Python to your Path environment
variable), then use pip install PyPDF2 to install the package and its dependencies. On Mac and
Linux, it’s probably built-in to your system (use pip install --user PyPDF2, though).
To install Poppler on Windows, I recommend doing it through
Chocolatey. Installing chocolatey is a bit more complicated
than normal programs, but the instructions are OK. After installing chocolatey, open a new admin
powershell window and type choco install poppler.
If you have MikTeX installed, then it came with the tools we need, so you don’t need to fret. If
you don’t want to do either, you can download the latest release here and place the files in the folder Library/Bin
where you need them (with the PDFs we will be working with). On Linux and Mac, it’s just a
command away.
Part 2: Sewing the pages
- Something to help when folding the pages (bone folder, back of scissors). I’m using a wood “bone” folder.
- Something to punch holes through (thick needle, for example). I’m using an appropriate punch for this.
- Some surface to help you punch the holes safely (a support or a piece of thick corrugated cardboard).
- A box cutter. A simple one is enough.
- A cutting board. Preserves your table and helps when aligning stuff.
- A ruler. Can be plastic or metal, but if you’re using it to guide your cut with a box cutter, it should be metal.
- Some string and an appropriate needle. If you can find a thicker, waxed string, your booklet will look better. I only had simple white cotton string and a hooked, bent needle, but it worked.
- Some material to function as your cover, like color paper, kraft paper, cardstock.
Let’s do it
Arranging the pages
Spellbook and reference card
The spellbook and reference card are simple. You can use their original form. The following code snippets are the entire .tex file you need to compile. Mind the filename!
Spellbook
\documentclass[a4paper]{article}
\usepackage{pdfpages}
\begin{document}
	\includepdf[pages={2-62},booklet=true,landscape,fitpaper=false]{original_spellbook.pdf}
\end{document}
Reference Card:
\documentclass[a4paper]{article}
\usepackage{pdfpages}
\begin{document}
	\includepdf[pages={1-6},booklet=true,landscape, delta=0 2mm]{original_refcard.pdf}
\end{document}
Manual
The manual is a problem. Its first and last PDF pages are “alone”, whereas the PDF pages in the middle contain two physical pages. We need to cut these in half and create a new PDF with the isolated pages. To do this, we will have to use Python.
My initial approach was to use PyPDF2 to create a duplicate of each doubled page, remove the
right half of the first page, then remove the left half of the second page. Then string these
pages in sequence, and send it to LaTeX. However, that only hid the other halves, it didn’t
actually delete them, and pdfpages was considering them when doing the layout.
Looking around, it seems the easiest free fix is to temporarily convert the “fixed” PDF to EPS,
then convert it back to PDF. I joined all those tasks in the following script. Mind that the
manual needs to be named original_manual.pdf. Paste these commands in a file called, for
example, convert_manual.py, then open a terminal window in that folder and type python
convert_manual.py and wait.
import PyPDF2
from pathlib import Path

path = Path(".") / "original_manual.pdf"
out_path = Path(".")
out_path.mkdir(exist_ok=True)
out_file_path = out_path / "original_manual_split.pdf"

pdf_writer = PyPDF2.PdfFileWriter()
pdf_reader_left = PyPDF2.PdfFileReader(str(path))
pdf_reader_right = PyPDF2.PdfFileReader(str(path))

print("Starting to split the pages in two... ", end="")
for i in range(pdf_reader_left.getNumPages()):
    if (i == 0) or (i == len(pdf_reader_left.pages) - 1):
        pdf_writer.addPage(pdf_reader_left.getPage(i))
        continue

    left = pdf_reader_left.getPage(i)
    right = pdf_reader_right.getPage(i)

    *_, width, height = left.mediaBox
    right_shift = 5

    # I think mediaBox is the only one necessary, but I'm not sure
    left.mediaBox.upperRight = (width / 2 - right_shift, height)
    right.mediaBox.lowerLeft = (width / 2 + right_shift, 0)
    left.trimBox.upperRight = (width / 2 - right_shift, height)
    right.trimBox.lowerLeft = (width / 2 + right_shift, 0)
    left.bleedBox.upperRight = (width / 2 - right_shift, height)
    right.bleedBox.lowerLeft = (width / 2 + right_shift, 0)
    left.artBox.upperRight = (width / 2 - right_shift, height)
    right.artBox.lowerLeft = (width / 2 + right_shift, 0)

    left.compressContentStreams()
    right.compressContentStreams()

    pdf_writer.addPage(left)
    pdf_writer.addPage(right)

with out_file_path.open(mode="wb") as fhand:
    pdf_writer.write(fhand)
print("Finished")

from subprocess import run

print("Creating eps, might take a while... ", end="")
run(["pdf2ps", "--eps", str(out_file_path), str(out_file_path.stem) + ".eps"])
print("Finished.")
print("Converting back to pdf... ", end="")
run(["ps2pdf", str(out_file_path.stem) + ".eps", str(out_file_path)])
print("Finished")
print("Removing temporary eps")
Path(out_file_path.stem + ".eps").unlink()
print("All done")
Then, just need to compile this simple latex file.
\documentclass[a4paper]{article}
\usepackage{pdfpages}
\begin{document}
	\includepdf[pages={3-38},booklet=true,landscape]{original_manual_split.pdf}
\end{document}
Cluebook
The cluebook also demanded more attention. Here’s the code:
import PyPDF2
from pathlib import Path

path = Path(".") / "original_cluebook.pdf"
out_path = Path(".")
out_path.mkdir(exist_ok=True)
out_file_path = out_path / "original_cluebook_split.pdf"

pdf_writer = PyPDF2.PdfFileWriter()
pdf_reader_left = PyPDF2.PdfFileReader(str(path))
pdf_reader_right = PyPDF2.PdfFileReader(str(path))

print("Starting to split the pages in two... ", end="", flush=True)
for i in range(pdf_reader_left.getNumPages()):
    left = pdf_reader_left.getPage(i)
    right = pdf_reader_right.getPage(i)

    *_, width, height = left.mediaBox
    right_shift = 0

    # I think mediaBox is the only one necessary, but I'm not sure
    left.mediaBox.upperRight = (width / 2 - right_shift, height)
    right.mediaBox.lowerLeft = (width / 2 + right_shift, 0)
    left.trimBox.upperRight = (width / 2 - right_shift, height)
    right.trimBox.lowerLeft = (width / 2 + right_shift, 0)
    left.bleedBox.upperRight = (width / 2 - right_shift, height)
    right.bleedBox.lowerLeft = (width / 2 + right_shift, 0)
    left.artBox.upperRight = (width / 2 - right_shift, height)
    right.artBox.lowerLeft = (width / 2 + right_shift, 0)

    left.compressContentStreams()
    right.compressContentStreams()

    pdf_writer.addPage(left)
    pdf_writer.addPage(right)

with out_file_path.open(mode="wb") as fhand:
    pdf_writer.write(fhand)
print("Finished", flush=True)

from subprocess import run

print("Creating eps, might take a while... ", end="", flush=True)
run(["pdf2ps", "--eps", str(out_file_path), str(out_file_path.stem) + ".eps"])
print("Finished.", flush=True)
print("Converting back to pdf... ", end="", flush=True)
run(["ps2pdf", str(out_file_path.stem) + ".eps", str(out_file_path)])
print("Finished", flush=True)
print("Removing temporary eps", flush=True)
Path(out_file_path.stem + ".eps").unlink()
print("All done", flush=True)
And here’s the .tex file.
\documentclass[a4paper]{article}
\usepackage{pdfpages}
\begin{document}
	\includepdf[pages={4-43},booklet=true,landscape, delta=0 0]{original_cluebook_split.pdf}
\end{document}
Printing and sewing
I followed her instructions. Warning: it’s in portuguese, but it should be easy enough to follow.
First, duplex print your PDFs. Then, get a cover. If your booklet is thick (like the spellbook), it has to be longer than an A4 page, or else you’ll have to trim a lot of the interior pages. If it’s not thick, then an A4 size cover is fine.
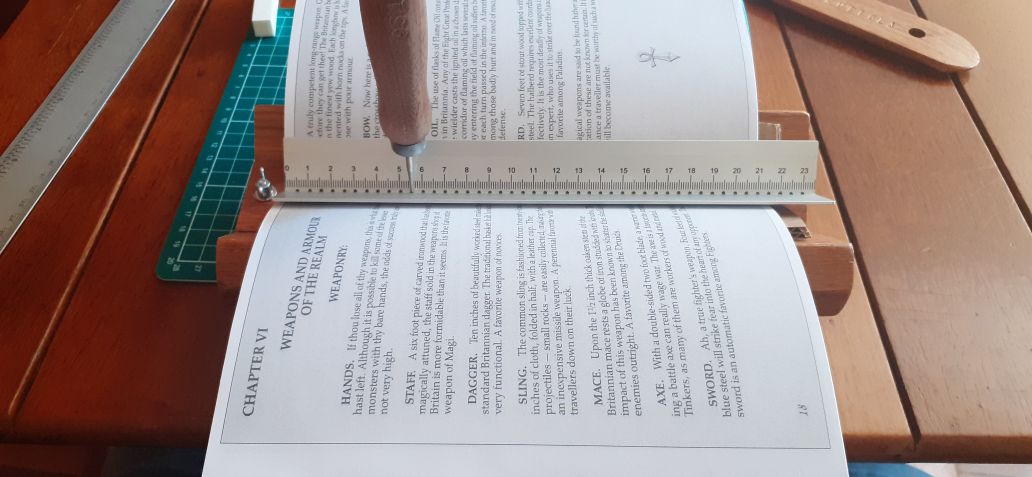
Align all the pages and fold them in half, carefully. Press down with your folder in the middle to make sure the fold is secured.
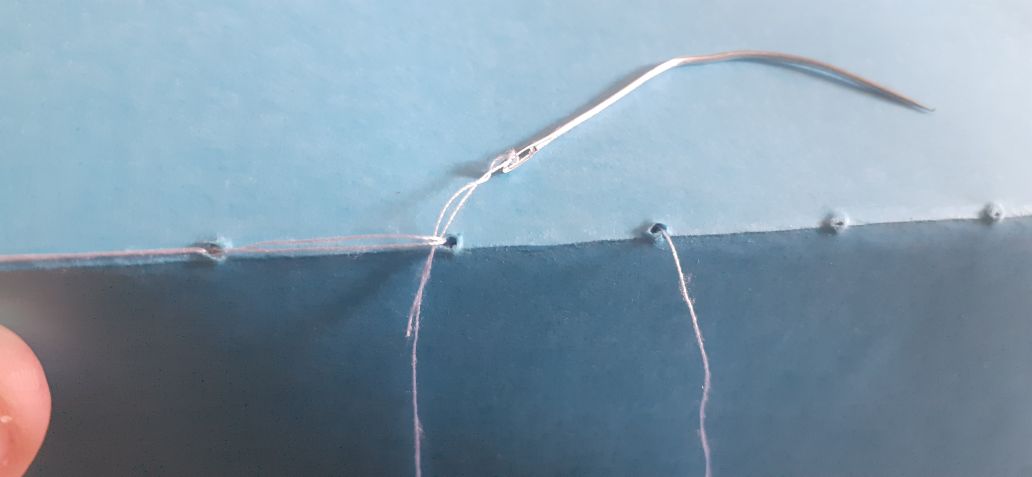
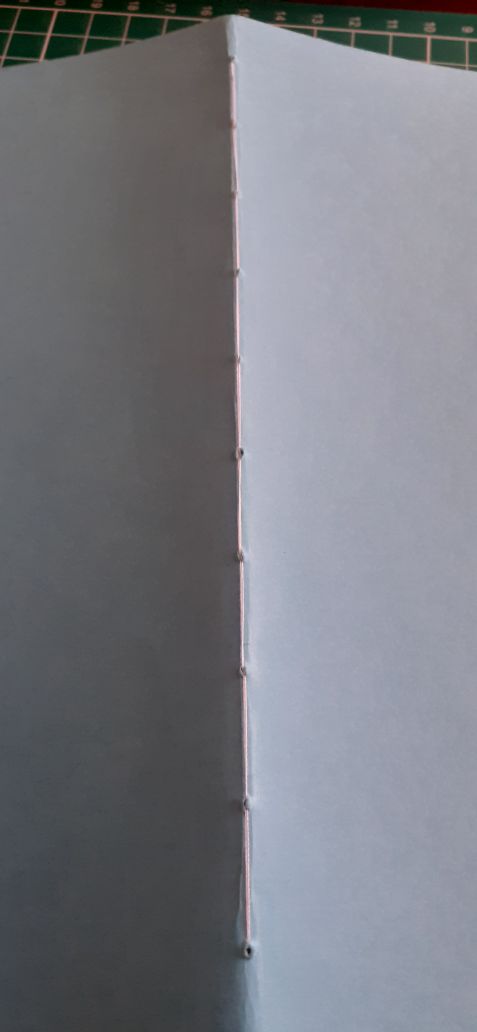
Then, place your stack of pages on some surface to punch the holes. I have a neat stand, but you can use a piece of cardboard. Your first hole is 1.5 cm from the edge. All the following holes are 2 cm from the first one. If everything was done right, the last hole will be 1.5 cm from the other edge.
Get your needle and thread. The length of thread should be about 3.5 times the length of the spine. Go through the first hole from the inside (either side works, but I tend to start from the right). Then, go back from outside-in from the second hole. Leave some thread behind, in the first hole. Let’s call this the tail.
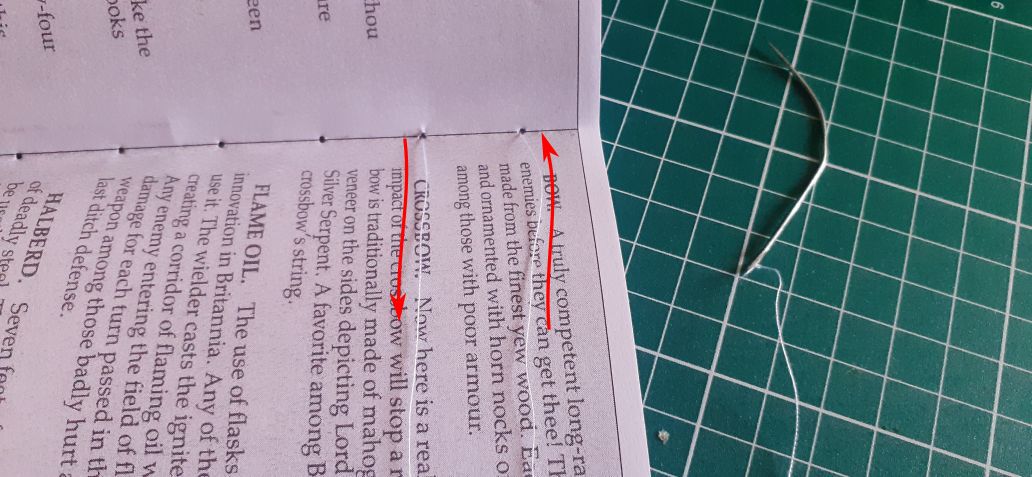
We need to tie the first knot. Pass the thread below that tail from the first hole. Pull everything tight. This made a thread go between the first and second holes in the inside. Go below this thread, then below the tail again. Pull everything a bit to make a loop.
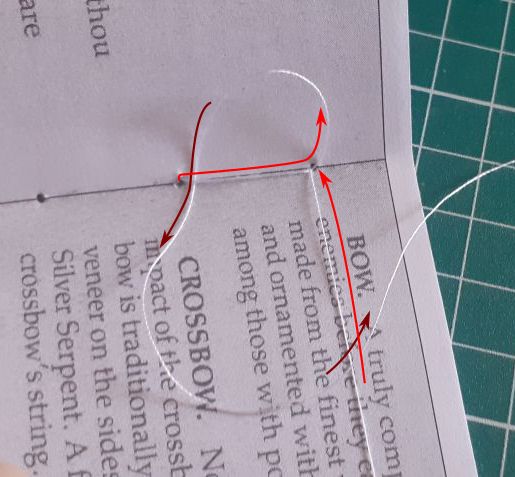
Go through the loop with your line and pull everything tight.
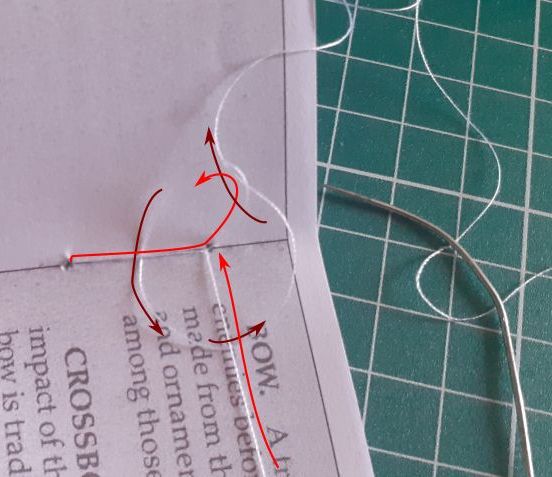
With luck, you’ll succeed in making your knot. You can do another one, just to be safe. Now, go through the first hole from inside-out, then through the second hole outside-in. Go through the third hole inside-out, then go below the two pieces of thread between holes 1 and 2. Pull everything tight, then go back through the third hole, outside-in. Continue this, going through a hole, then below the two threads of the previous hole, then through that same hole again, until the last.
Here, we need to tie another knot. This one is simpler. Inside, go through the thread between the last and second-to-last holes, forming a loop. Go through the loop and pull everything tight. Repeat if you want.

It’s done! Use your folder on the spine again to make sure everything is tight.
Now we need to trim the edges. This is optional, but the result looks much better. The only straight edge you have is your spine, so align it on your mat. Find some marking and inch your booklet, keeping it aligned, until the excess you want to trim is part your marking. In the figure, I chose the mark at 24 cm.
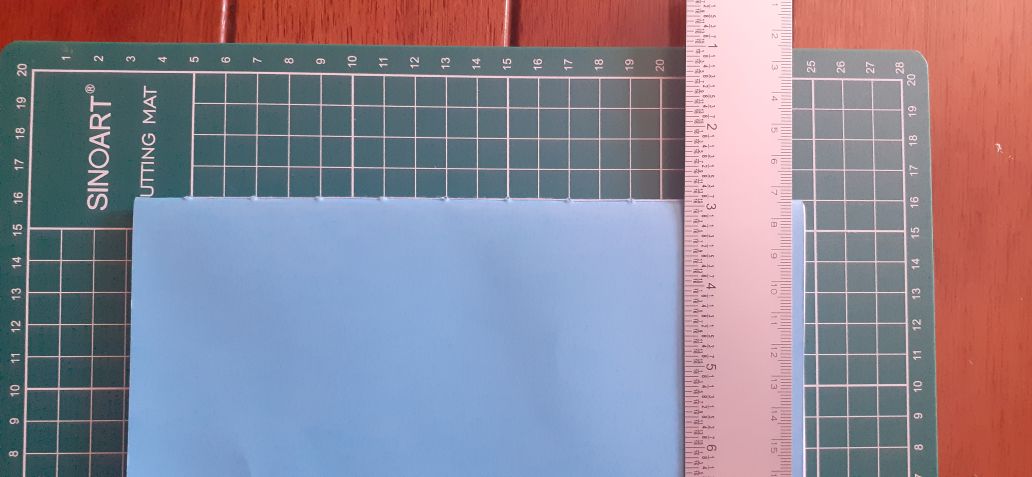
Stand up and place your metal ruler on the mark you chose on the cutting board and put some pressure on it. This is keeping everything aligned, so don’t move! With your box cutter, with a gentle but firm touch, go from top to bottom. You don’t need to apply much pressure. After many passes, every thing will come out naturally. It’s better to have a sharp blade, so you can break the last section of your box cutter with some pliers before attempting this.
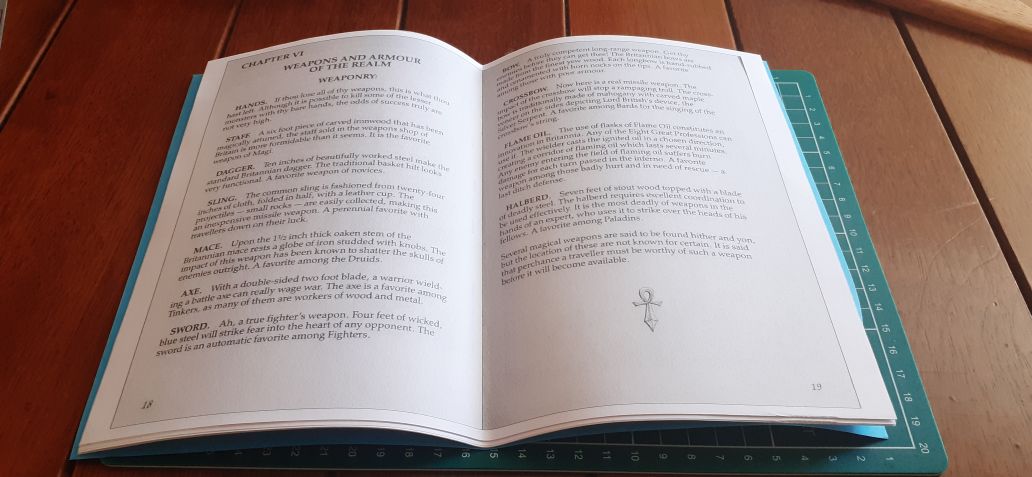
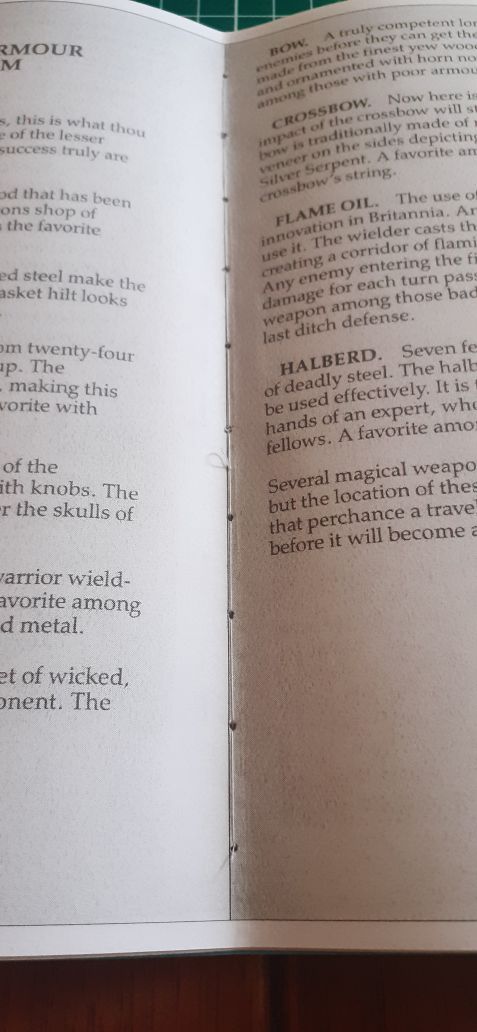
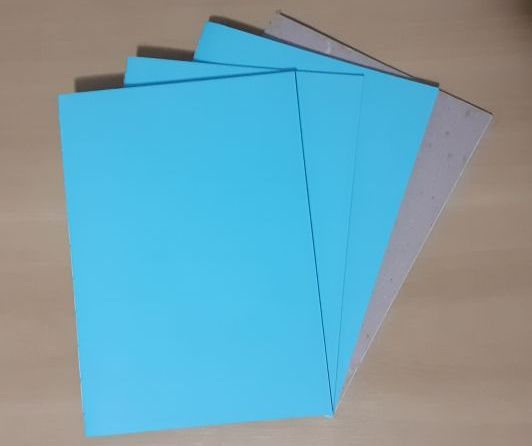
Do the same to the other 2 edges and you have yourself a new booklet! Here’s mine, with ugly covers, but it’s what I had available.
Now go enjoy U4 with physical copies of the manuals!
tags: ultima - games - bookbinding - latex